Oliver's class is in the middle of doing a fun project where each child has to bring in and present one of his or her favorite recipes. Since our littlest is a passionate pancake sort of guy, he's slated to bring in the following recipe this week. They are required to go shopping for the ingredients for their recipe and also to make the actual recipe together with a loving adult in their lives. I think it's such a creative way of introducing the little Grade Ones to things like list-making, public speaking and cooking and the consequent math involved. Ollie's recipe is from Barefoot Contessa's Family Style.
Makes 12 pancakes
1 ½ cups unbleached flour
3 tablespoons sugar
2 teaspoons baking powder
1 ½ teaspoons kosher salt
½ cup sour cream
¾ cup plus 1 tablespoon milk
2 extra-large eggs
1 teaspoon pure vanilla extract
1 teaspoon grated lemon zest
Unsalted butter
2 ripe bananas, diced, plus extra for serving
Pure maple syrup
In a medium bowl, sift together the flour, sugar, baking powder and salt. Whisk together the sour cream, milk, eggs, vanilla and lemon zest. Add the wet ingredients to the dry ones, mixing only until combined.
Melt 1 tablespoon of butter in a large skillet over medium-low heat until it bubbles. Ladle the pancake batter into the pan. Distribute a rounded tablespoon of bananas on each pancake. Cook for 2-3 minutes, until bubbles appear on top and the underside is nicely browned. Flip the pancakes and then cook for another minute, until browned. Wipe out the pan with a paper towel, add more butter to the pan, and continue cooking pancakes until all the batter is used. Serve with sliced bananas, butter and maple syrup. Another fun option is to serve with maple whipped cream and blueberries.
1 cup steel cut oats
1/2 cup dried cranberries
1/2 cup pecans (or other nuts)
4 cups water (or a water/milk combo)
1/8 cup brown sugar (or agave syrup)
1 T butter
1/4 tsp salt
2 tsp vanilla
3 (or more) tsp cinnamon
2 (or more) cups chopped apple or pear
Spray the inside of your slow cooker with nonstick cooking spray. Combine all ingredients in the slow cooker and mix well. Cover and turn on LOW setting and cook overnight. Stir well before serving.
JoyBoy made all my Christmas dreams come true in a gift sense this year. When my sisters and I spent part of November in Maui, our ziplining escapades were earmarked as my Christmas gift for this year. In my mind, that helped justify the expense. However, in a combined annoying/delighting move, JoyBoy countermanded my strict injunctions to meander no farther into the Land of Gifts. As is his way, he promptly ignored me and came home a few days before Christmas, heavily laden with something I've coveted for years and years. For very close to a decade, I've wanted a Kitchen Aid mixer, but could never justify getting one for myself. There were many more pressing financial priorities obscuring my view of the Land of Unlimited Kitchen Glory. Things like braces for cute kids with gnarled teeth. Disability insurance: the most decidedly unsexy financial priority I've yet paid hand over fist for. This type of thing. So when that guy walked in, lugging in the monstrously heavy and tangible fulfillment of all my kitchen fantasies, I very nearly swooned. And then I made this. I highly recommend that you do, too. It's even better the second day, chilly and freshly liberated from it's refrigerated confines. Old Fashioned Banana Cake with Cream Cheese Frosting Recipe courtesy of Barefoot Contessa’s How Easy Is That 3 very ripe bananas, mashed (I used four) 3/4 cup granulated sugar 1/2 cup light brown sugar, lightly packed 1/2 cup vegetable oil 2 extra-large eggs, at room temperature 1/2 cup sour cream 1 teaspoon vanilla extract Grated zest of 1 orange 2 cups all-purpose flour 1 teaspoon baking soda 1/2 teaspoon kosher salt 1/2 cup coarsely chopped walnuts Cream cheese frosting (recipe follows) Walnut halves, for decorating PREHEAT oven to 350 degrees. Grease and flour a 9 x 2-inch round cake pan. MIX bananas, granulated sugar and brown sugar in bowl with an electric mixer on low speed until combined. Add oil, eggs, sour cream. vanilla and orange zest. Mix until smooth. STIR together flour, baking soda and salt in a separate bowl. With mixer on low, add dry ingredients and mix just until combined. Stir in chopped walnuts. Pour batter into the prepared pan and bake for 45 to 50 minutes, until a toothpick inserted in the center comes out clean. Cool in pan for 15 minutes, turn out onto cooling rack and cool completely. SPREAD frosting thickly on top of cake and decorate with walnut halves. Slice and serve. Makes 8 servings. Cream Cheese Frosting 6 ounces cream cheese, at room temperature 6 tablespoons unsalted butter, at room temperature 1 teaspoon pure vanilla extract 2 1/2 cups sifted confectioners’ sugar (1/2 pound) MIX cream cheese, butter and vanilla in the bowl of an electric mixer fitted with paddle attachment on low speed until just combined. Don’t whip. Add sugar and mix until smooth.
We had - as we most often do - my husband's extended family over for Christmas dinner. Even though the two-days' work of it beforehand sometimes feels a bit prohibitive, once they all arrive - noisy, laughing masses of them - it all feels well worth it.
The kids have all grown up to an age where they're almost entirely independent and so we adults are freed up to selfishly pursue our own less infantile (or so we tell ourselves) interests. Long moments of huddling over toddler -sized plates, painstakingly cutting up bits of turkey so they no longer pose choking hazards, characterize these times together no longer. The youngest in the group is my very own Oliver, who is a great, big, self-sufficient seven and who runs around frantically, shirt-tail sweatily untucked, with the very best of them.
There were 22 of us gathered together and to say that we were loud is a ludicrous understatement. We aggressively clamored for conversational preeminence. Once achieved, that heady position was almost instantly again stolen by the next extrovert.
The kids played pool, ping-pong and fooseball. They chased one another around and basked in the delicious warm of spending long chunks of unscheduled time with not-oft-seen cousins. It made me feel a stab of happy watching them enjoy themselves so much. They didn't even seem to need the atrocious culinary excess to fulfill all their Christmas dreams in the way we adults most markedly did. We ate till we felt sick and asked one another in a turkey-induced daze, "why would I do that to myself?" And then we had dessert.
We had a white elephant gift exchange, which was the brain-child of my very clever sister-in-law. We were allowed three steals per gift and it was a lot of fun. I also loved that it didn't contribute to yet more excess, and in fact, allowed us to do some intentional regifting to those whom we felt would be more suitable recipients of the 'goods' we had on hand.
In a fit of Christmas generosity, I want to share a new-to-me recipe that a friend passed along this year. Though to call this a vegetable requires a great deal of eye squinting and even some intentional misleading., we ate and loved this trashy little number this year. It is the o-so-lofty and elegant sounding:
Sweet Potato Souffle
2 cups cooked, mashed sweet potato
3/4 cup sugar
2 eggs
1/4 cup butter
3/4 cup evaporated milk
2 tsp. vanilla
2 tsp. cinnamon
Beat together. Bake 30-45 minutes at 350 degrees Celcius until set in a shallow, buttered casserole dish. Sprinkle with topping and return to oven for 10-15 minutes longer before serving.
Topping (mix together in a small bowl):
1/4 cup melted butter
1/2 cup brown sugar
1/2 cup chopped nuts
3/4 cup rice krispies
I post this, even if only for my sisters. They will love it and so might you. The recipe serves four and is the equivalent of 3 weight watchers points per serving. It rocks my socks, though I add lots of extra hot sauce to mine just before serving. I could see cilantro enhancing things too.
2 cans reduced-sodium chicken broth
2 T soy sauce
1/8 t red pepper flakes (I added much more)
8 oz fresh shiitake mushrooms, sliced
4 t rice vinegar
2 T cornstarch
1 large egg, beaten
1/2 package firm low-fat tofu, cut into small cubes and drained well
2 T finely grated ginger
3 scallions, thinly sliced
1 t toasted sesame oil
In a large pot, combine the broth, soy sauce, red pepper flakes and 2 cups water. Bring to a boil over medium heat. Add the mushrooms; reduce the heat, and simmer until tender, about 10 minutes.
In a small bowl, whisk together 3 T of the vinegar and the cornstarch. Add to the pot; simmer, stirring, until the soup is thickened, about 1 minute.
Add the egg through a slotted spoon, and stir to form ribbons. Stir in the tofu. remove from the heat; let stand, covered, for 1 minute. Add the ginger and the sesame oil. Taste and add the remaining tablespoon of vinegar, if desired. Serve sprinkled with the scallions.
Ok, via the ever-helpful Internet, I found a recipe for a sickness tea that I LOVE. It's too early in the day to vouch for it's health claims, but the taste! It knocks my socks off. And here it is:
1-2 inch chunk of ginger, peeled and thinly sliced
1 chili pepper, de-seeded and sliced
1-2 sprigs of fresh thyme
1/2 lemon, thinly sliced
Boil together with about three cups water and then reduce to a simmer for about ten minutes. Add 1/2-1 tsp. honey and enjoy. Brace yourself for a kick and enjoy a unique and invigorating tea. Love it!
I've mentioned my passion for mushrooms to you. You may or may not recall. Essentially I think mushrooms rock. I scramble for some more convincing, eloquent way to describe these perfect morsels. Phrases like stuff of the gods spring to mind and yet, don't quite seem to capture the near ecstasy I feel while eating them and while thinking about eating them. The other night, I sauteed a mix of cremini, shiitake, brown button and portobello. I added a little olive oil, salt and the ever-ubiquitous garlic and there! you have it: the perfect food. I realized as I ate them in an almost desperate fashion that I wasn't a kid anymore. Only my husband and I clamoured for them; the kids watched us in disgusted silence and contented themselves with the pasta and rose sauce, which for me, was the clear cut side dish of the evening.
The meaty substantialness makes my belly feel like it's just returned from a sleepover at my Grandma's house. I feel content in the way that her air-dried flannel sheets, still smelling of love and of the sun made me feel when I was eight. Mushrooms and Grandma and sunshine and love. Stuff of the gods.
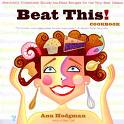
From Beat This!
By Ann Hodgman, who writes:
This may be the best dessert in the world. It's certainly my daughter Laura's favorite. When she was six, she wrote her own version of the recipe, which read as follows:
4 squares of bitter chocolate
some buttercream
one bag of raspberries
plan crust
Melt the bitter chocolate. Smush the raspberries. Make the crust. First put the raspberries in the crust. Then buttercream. Then freeze it. Then it is done.
Laura was wrong about one thing. This recipe doesn't freeze well at all; the raspberry filling goes all kerflooey. (Generally, sauces and fillings containing cornstarch can't be frozen.) But you can make parts of it ahead of time if you want to. I'd recommend it because the pie is rather labor-intensive to do all at once. The crust (which can be frozen) can be made a few days in advance, as can the raspberry filling (which should be refrigerated).
Note that there are uncooked eggs in this pie. For a while I worried about what to do with uncooked eggs in this book. Finally I decided it would be enough to warn people about them. I've fed this pie to lots and lots of people, and they're all still with us.
Tart Shell
1 1/2 cups all-purpose flour
1 tablespoon sugar
1/4 teaspoon salt
3/4 cup (1 1/2 sticks) unsalted butter, chilled and cut into 10-12 slices
1/4 cup ice water
1/2 teaspoon vanilla extract
Raspberry Filling
1 12-ounce bag unsweetened frozen raspberries, thawed
1 tablespoon fresh lemon juice
3 tablespoons sugar
2 tablespoons cornstarch
White Chocolate Buttercream (reserve 1/2 cup for optional garnish)
4 ounces white chocolate, coarsely chopped
1/2 cup (1 stick) unsalted butter, at room temperature
1/4 cup superfine sugar
Pinch salt
2 large eggs, at room temperature
1/2 teaspoon vanilla extract
Note: If the eggs or butter are too cold, you will end up with a gloppy mess.
Chocolate Glaze
2 ounces bittersweet chocolate, coarsely chopped
2 ounces unsweetened chocolate, coarsely chopped
1/4 cup (1/2 stick) unsalted butter
Garnish (optional)
10 fresh raspberries
Reserved 1/2 cup white chocolate buttercream
Tart shell: Butter the sides and bottom of an 11-inch round fluted tart pan with a removable bottom.
In the bowl of a food processor fitted with a steel blade, place the flour, the sugar and the salt. Pulse the processor on and off a few times to blend the dry ingredients. Drop the sliced butter on top of the dry ingredients and pulse about 20 times, or until the mixture resembles cornmeal. Combine the water and vanilla extract in a small bowl. With the processor motor running, pour the water mixture through the feed tube. Process just until the dough forms a ball.
Divide the ball of dough into 4 roughly equal portions and place them in the buttered tart pan, spacing them evenly. Using your fingertips, press the dough evenly into the tart pan. The dough should be slightly thicker around the sides and should extend about 1/4 inch above the top of the pan.
Chill the dough for 1 hour. Then preheat the oven to 375 degrees F. Lightly butter one side of a 14-inch square of aluminum foil and place it, buttered-side down, on the unbaked tart shell. With a fork, prick through the foil (and the tart shell, of course) in 12 places on the bottom and 8 places on the sides. Then fill the foil with 2 cups of aluminum pie weights, raw rice or dried beans, spreading them evenly.
Bake the tart shell for 20 to 25 minutes, or until the edges are slightly browned. Carefully lift out the foil and whatever you've weighted it with, and bake the shell for about 10 minutes more, or until it is entirely golden brown.
Cool the shell on a rack, leaving it in the pan.
Raspberry Filling: Strain the thawed raspberries through a fine sieve a little at a time, pausing frequently to dump out the seeds. Stir the lemon juice into the pureed raspberries.
In a small nonaluminum saucepan, stir together the sugar and the cornstarch. Then thoroughly whisk in the raspberry puree. Cook the mixture over medium heat, stirring constantly, until it reaches a full rolling boil. Continue to boil the mixture, stirring, for 5 seconds, then remove it from the heat. Don't taste too much of ityou really need it all.
If you're making the raspberry filling the day before you make the tart, cool it to room temperature; then cover it with plastic wrap and chill overnight. If you're making it on the day you plan to use it, stir over iced water until chilled. Then cover it with plastic wrap and chill it.
White chocolate buttercream: In the top of a double boiler over hot waterneither boiling nor simmeringstir the white chocolate until it is two-thirds melted. Then remove from over the hot water and stir until thoroughly melted. White chocolate gets very nasty when it's overheated, and this will help keep it from seizing. If the chocolate isn't already tepid, cool it until it is.
In the small bowl of a standing mixer, or in a medium bowl with a hand-held mixer, cream the butter and sugar together for 5 minutes. Gradually beat in the tepid white chocolate and the salt. Add the eggs, one at a time, beating the mixture until fluffy after each egg. Beat in the vanilla extract. Set aside 1/2 cup of the mixture to garnish the tart, if you plan to do so.
It will all go easier if you leave the tart in the tart pan for now.
Spread the chilled raspberry filling evenly across the bottom of the baked tart shell. (One of those half-width rubber scrapers works well for this.) Spread the white chocolate buttercream across the raspberry layer. Be sure you extend the buttercream all the way to the edges; don't leave any raspberry filling showing.
Chill the tart for 30 minutes to firm the buttercream layer.
Chocolate Glaze: In the top of a double boiler, over barely simmering water, stir together the chocolates and the butter until they're mostly melted. Then remove from the heat and stir until fully melted. Cool for 5 minutes. Take the tart out of the fridge.
Pour the chocolate glaze over the buttercream, tilting the tart pan back and forth until it's thoroughly coated. (It doesn't matter if some glaze drips over the sides.) If that makes you too nervous, you can spread the glaze with a spatula.
Chill the tart yet again. If you plan to garnish it, place the reserved 1/2 cup buttercream in a pastry bag or a pastry tube fitted with a star tip. Pipe 10 evenly spaced rosettes around the center of the tart, and top each rosette with a (perfectly dry, so it won't smear) fresh raspberry.
Or you can just do the rosettes. Or you can just eat the buttercream with a spoon. When I'm pressed for time, I melt about 3 ounces of white chocolate, dip my finger in and repeatedly shake my finger over the tart. This makes a sort of scribbly pattern that I like to think looks high tech.
Return the tart to the refrigerator until serving time.
About 1/2 hour before serving, remove the tart from the refrigerator and take it out of its tin. Then set it on a serving plate and leave at room temperature until the rest of the 1/2 hour is over.
Serves 6 to 8, depending on seconds requested.
*My only comments are that I didn't strain the raspberry concoction as I love the seeds and that this dessert is one of the very best things I've ever eaten. It's actually crazy. This is anything but average.
We went to the home of some friends last night for dinner and what turned out to be mainly laughing. It was my job to bring dessert and so I spent quite a large chunk of my afternoon baking Caramilk Brownies. They're a true fabulosity and I bake them semi-often for special social times. When I put them into the oven to bake, I promptly forgot that I had done so and left the house for a whirl-wind session of errand running. At about the hour and a half mark, two fire trucks raced by me in what appeared to be the direction of my home, at which point it dawned on me that my abandoned brownies were probably burning my house down at that very moment. Suffice it to say, I was feeling a little melodramatic and when I called my husband to check, the only evidence of my imagined disaster were some really hard brownies, substantially darker around the edges than I believe they're supposed to be. So, in a fit of minor desperation, these magical little beauties emerged into the world. Let's call them: The Fire Cookie
Layer:
A white chocolate macadamia nut cookie
A scoop of premium vanilla ice cream or frozen yogurt
Toasted pecans
A substantial scoop of caramel sauce made from simmering together the following ingredients:
1/2 cup brown sugar
1/2 cup white sugar
1/2 cup whipping cream
1/2 cup butter
On the side, I also placed a cinnamon swirl bread twist. Not bad for a hastily assembled grocery store confection!
This is, I'm almost certain, the best cake I've ever made. If you decide to go for it, tell me all about the consequent swooning! Chocolate Pumpkin Cake
From Country Living Magazine1 1/2 cup(s) flour 2/3 cup(s) cocoa 2 teaspoon(s) baking powder 1 teaspoon(s) baking soda 1/2 teaspoon(s) salt 1/2 cup(s) buttermilk 1 cup(s) canned pumpkin 2 teaspoon(s) vanilla extract 3/4 cup(s) butter, softened 1 cup(s) dark brown sugar 1 cup(s) granulated sugar 3 large eggs 1 egg yolk DIRECTIONS - Line the bottoms of two 8-inch cake pans with parchment paper and lightly butter. Preheat oven to 375 degrees Fahrenheit.
- Sift the flour, cocoa, baking powder, baking soda, and salt together. Stir the buttermilk, pumpkin, and vanilla extract together in a small bowl. Beat the butter and sugars together using an electric mixer on medium speed until light and fluffy. Beat in the eggs and yolk, one at a time. Reduce mixer speed to low and alternately beat in the flour and buttermilk mixtures in thirds.
- Pour the batter into the prepared pans. Bake until a tester, inserted in the center, comes out clean--about 35 minutes. Cool layers completely before icing.
- Step 1: Frost Beat 6 ounces softened cream cheese using a mixer set on medium-high speed until fluffy. Add 1 1/2 cups confectioners' sugar, 2 1/4 teaspoons cocoa, 1/4 teaspoon cinnamon, and 3/4 teaspoon vanilla and beat on low speed until well combined. In a separate bowl, beat 1 1/2 cups heavy cream with 3/4 cup confectioners' sugar and a scant 1/4 teaspoon orange food coloring on medium-high to soft peaks. Gently fold the whipped cream into the cream cheese mixture until well combined. Spread 1 cup frosting between the two layers and use the remaining frosting to ice the top and sides of the cake. Chill 30 minutes and proceed to step 2. Makes 3 cups.
- Step 2: Glaze Place 4 ounces of chopped bittersweet chocolate, 1 tablespoon cold unsalted butter, and 3 tablespoons corn syrup in a medium heatproof bowl. Bring 1/2 cup heavy cream to a boil, pour it over the chocolate, and let sit for 3 minutes. Gently stir, using a whisk, until smooth. Let sit for 3 to 5 minutes, until the glaze thickens slightly. Pour the glaze onto the center of the frosted cake and smooth out to the edges to allow the glaze to drop over the sides. Makes 1 cup.
NUTRITIONAL INFORMATION (per serving) Calories 610 Total Fat 33g Saturated Fat -- Cholesterol 150mg Sodium 310mg Total Carbohydrate 79g Dietary Fiber 3g Sugars -- Protein 7g Calcium --
|


 RSS Feed